Decorating a Studio Apartment: Layout and Design Tips
My studio apartment was a disaster. Not because it was small – I actually love the coziness of a studio – but because I had no idea how to make it feel like a home instead of just one big room with a bed in it. I moved in with a futon, a tiny desk, and a bunch of hand-me-down bookshelves, and for the first six months, it genuinely felt like I was living in a dorm room. The biggest problem was the lack of defined spaces. My bed was practically next to my “kitchen” (a mini-fridge and a microwave stand), and my “living room” furniture was pushed up against the only window. It felt cramped, chaotic, and definitely not like a place I wanted to invite people over to. The most frustrating part was trying to find a balance between making it feel open and airy, while also creating the illusion of separate areas for sleeping, eating, and relaxing. I tried just moving furniture around randomly, but that just made it feel like a puzzle I couldn’t solve, leaving me with awkwardly placed pieces and no real flow.
Zoning Your Space Without Walls
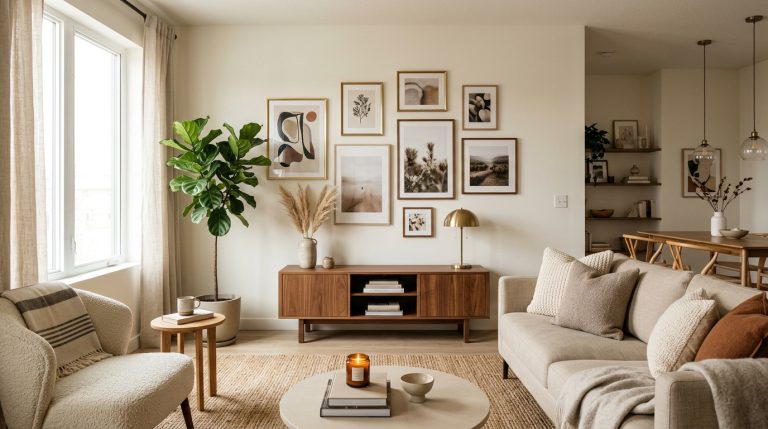
The first real breakthrough came when I stopped trying to cram everything against the walls and started thinking about “zones.” The biggest mistake I made initially was pushing all my furniture to the perimeter, which actually made the middle of the room feel empty and the edges feel cluttered. Instead, I started using larger pieces of furniture to create natural divisions. My main living area is about 12×18 feet, which is pretty standard for a studio in my city. For the sleeping area, I bought an IKEA KALLAX 4×2 shelving unit (around $70-80, depending on color) and placed it perpendicular to the wall, about three feet from the head of my bed. This immediately created a visual barrier, making the bed feel like its own little alcove. It’s not a full wall, but it’s enough to define the space. I used the shelves to store books and a few decorative items, making it functional too. If you’re looking for something a bit more open, the IKEA VEBERÖD screen (around $100) is another good option; it lets light through but still divides the space.
The Rug Rule: Go Bigger Than You Think
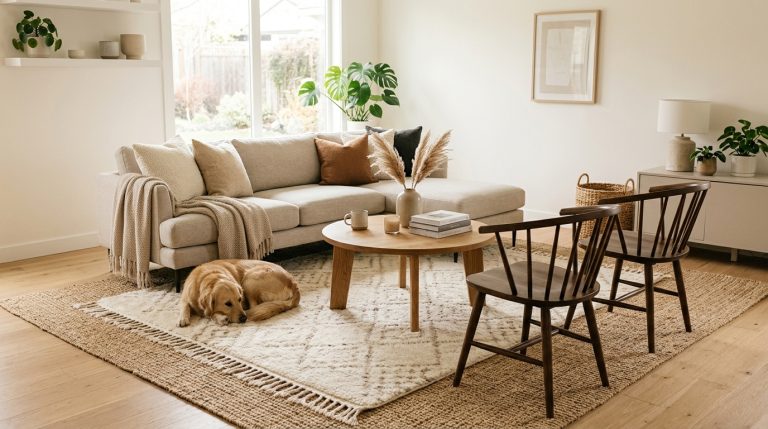
My second major lesson was about rugs. I initially bought a 5×7 rug for my “living room” area, thinking it would be plenty big. It wasn’t. It just floated in the middle of the room like a postage stamp, making the small space feel even smaller and disconnected. I learned that for a room section to feel cohesive, at least the front two legs of your main furniture pieces (like your sofa or armchairs) need to be on the rug. In my 12×18 studio, with my sofa and a small armchair defining the living zone, I needed at least an 8×10 rug. I ended up finding a great geometric rug from Wayfair for about $150 during a sale – just make sure to read the reviews for shedding! I also put a smaller 5×7 rug under my bed in the “bedroom” zone. It doesn’t need to cover the whole floor, but having it extend a foot or two on either side of the bed, and under the bottom two legs, anchors the space and makes it feel cozy. Skip those small 4×6 rugs unless they are specifically for an entryway or bathroom. They just don’t do enough in a living space.
Smart Storage is Your Best Friend
Living in a studio means every item needs a purpose, and ideally, a hidden one. I made the mistake of just having open shelving everywhere, which quickly looked cluttered. My old hand-me-down bookshelves were an eyesore. I eventually invested in closed storage. My KALLAX unit, mentioned earlier, holds some storage boxes that hide various odds and ends. I also bought an ottoman with storage (found a decent one at HomeGoods for about $60) – it serves as extra seating, a footrest, and a place to stash blankets and magazines. Under-bed storage bins are also a lifesaver. I use the IKEA SKUBB storage boxes (pack of 3 for about $20) for out-of-season clothes and extra linens. And if you have vertical space, use it! Floating shelves above my desk hold books and a few decorative items without taking up floor space. Just be mindful not to overdo it; too many open shelves can still feel messy.
Lighting: More Than Just an Overhead Light
For too long, I relied on the single, harsh overhead light that came with the apartment. It made the whole place feel flat and uninviting. The solution was layered lighting. I bought a cheap floor lamp (Target’s Threshold brand, about $30) for the living area, which casts a much softer glow. For my desk, a small task lamp (IKEA’s FORSÅ lamp, around $25) provides direct light for working. And for the sleeping area, I have a small bedside lamp (a vintage find from a thrift store for $10) which creates a cozy ambiance. The key is to have multiple light sources at different heights and intensities. Dimmers are also fantastic if you can install them easily. This creates depth and allows you to adjust the mood of each “zone” independently. Don’t forget string lights if you want a really warm, relaxed vibe – I have a simple set from Amazon ($15) draped over my KALLAX unit, which adds a nice touch in the evenings.
The “No Clutter” Rule
This is probably the hardest one, but essential for a studio. Since every corner is visible, clutter amplifies tenfold. I used to leave mail, keys, and various random items on my small entryway table. It made the whole apartment feel disorganized. Now, I have designated spots for everything. Keys go on a hook by the door. Mail gets sorted immediately into “deal with now” or “file away.” I also learned to be ruthless about what I bring into the apartment. If I buy something new, something old has to go. This isn’t about being a minimalist, but about being intentional. A studio can look messy very quickly, so keeping surfaces clear and having a place for everything is non-negotiable.
Your action for this weekend: Measure your main living area and sketch out where your furniture currently sits. Then, brainstorm how you could use a single, larger piece of furniture (like a bookshelf, a console table, or even the back of your sofa) to create a visual barrier between two functional areas. Don’t buy anything yet, just visualize and see where you can create those “zones.”
Frequently Asked Questions
How can I effectively define separate living areas within a studio apartment?
Use furniture like bookshelves, screens, or rugs to create visual boundaries. Zoned lighting, different wall colors, or even a raised platform can also delineate distinct functional spaces without permanent walls.
What type of furniture is ideal for a studio apartment to save space?
Opt for multi-functional pieces like sofa beds, nesting tables, storage ottomans, or wall-mounted desks. Choose vertical storage and furniture with slender profiles to avoid overcrowding and maximize floor space efficiently.
What design tips can make a studio apartment feel more spacious?
Utilize light colors, mirrors, and good lighting to expand the perception of space. Keep clutter minimal, choose transparent or leggy furniture, and use vertical lines to draw the eye upward, making ceilings appear higher.